Overview
Meteor is a web framework written on top of Node.js. Meteor hooks into Passenger for seamless process launching and flexible, agile scalability. Meteor requires terminal access to use. This guide covers launching Meteor on a v6+ platform.
Quickstart
- PREREQUISITE: follow the MongoDB tutorial to setup MongoDB.
- Install Meteor from the terminal:
-
cd ~ curl https://install.meteor.com/ | sh - Once done, you’ll see a confirmation that it has been installed:
Meteor 1.0.3.1 has been installed in your home directory (~/.meteor).
Writing a launcher script to /usr/local/bin/meteor for your convenience.

To get started fast:

$ meteor create ~/my_cool_app
$ cd ~/my_cool_app
$ meteor
- Note: tempting as it may be, do not install the
meteorpackage from npm. The package available is an unofficial fork and has not been removed by the repository custodian.
-
- Change directories to
/var/wwwto create a new Meteor app that will, in this example, be calledmeteorappand connected to a subdomain accessible viahttp://meteorapp.example.com:-
cd /var/www
meteor create meteorapp
-
- Next, connect
public/to a subdomain within the control panel via Web > Subdomains
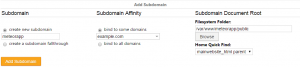
Connecting Meteor to a subdomain in the control panel
- Now for the most difficult and daring step: adding 6 directives and substituting variables! Meteor requires a few environment variables to run reliably. These variables are handed off from Apache to Passenger and passed onto Meteor. You will need to know your home directory, because this location stores a few additional Meteor system files. Create a .htaccess control file in
public/-
PassengerNodejs /usr/bin/node
PassengerStickySessions On
SetEnv HOME /home/<USERNAME>
SetEnv MONGO_URL mongodb://127.0.0.1:<PORT>/meteor
SetEnv MONGO_OPLOG_URL mongodb://127.0.0.1:<PORT>/local
SetEnv ROOT_URL http://<HOSTNAME>
- Substitute <HOSTNAME> for your fully-qualified domain created within the control panel. In our example, taking into account the domain example.com and subdomain meteorapp, it is meteorapp.example.com.
- Substitute <PORT> for the MongoDB port chosen from the PREREQUISITE MongoDB tutorial at the start.
- Substitute <USERNAME> for the username that you logged into the control panel with and where Meteor was installed. This is your home directory.
-
- Access your Meteor install through the web site. The first request will take several seconds to initialize and connect to the database. Once initialized, subsequent requests will be much faster (and have a 95% chance of vaporizing from exceeding terminal velocity).
- Enjoy!
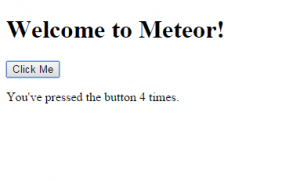
Meteor confirmation page after installation


Odds and Ends
Restarting
Meteor piggybacks Passenger, and in doing so, can be easily restarted using the tmp/ control directory. Follow the general guide to restarting a Passenger-backed application.
See also
- Official Meteor tutorial – skip install steps!
- Meteor documentation
- Discover Meteor ($) – an excellent eBook on developing using Meteor
- Meteor demo install on a v6 platform